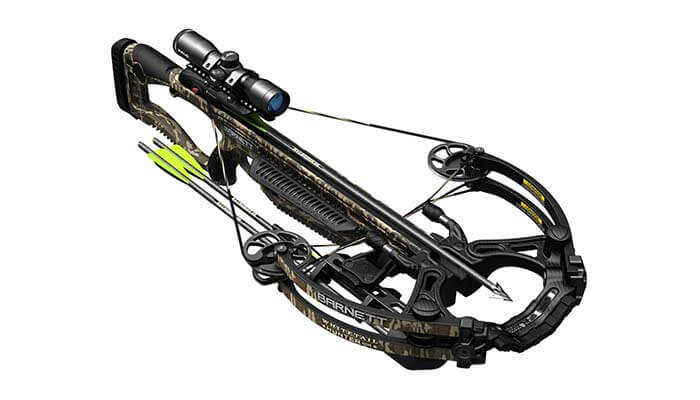
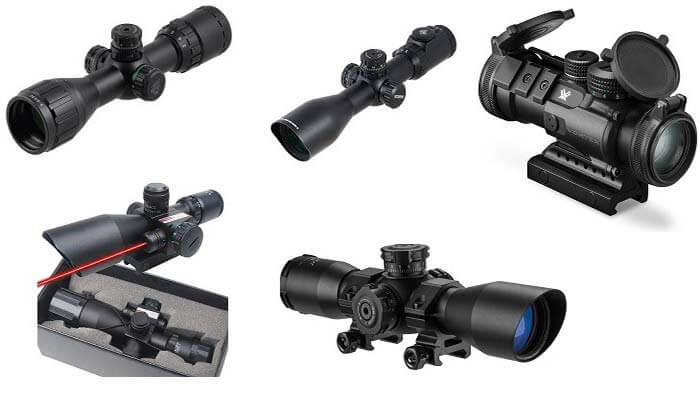
There are some factors you need to consider before you use a rifle scope on a crossbow. These factors, along with the information in them, will ensure you get the right scope for your specific crossbow. Some of the questions you need to answer are:
- Can I use a rifle scope with a crossbow?
- If I can, how do I mount the rifle scope?
- Are there any suggestions for ensuring the scope provides the perfect shot?
Can I Use a Rifle Scope on a Crossbow?
Yes, you can use a rifle scope on your crossbow. Take note there is some risk involved in terms of holding up to the “forward” recoil common with crossbows. With this in mind, you can comfortably use any riflescope with your crossbow.
For this to work, there are some things you need to consider. Having a crossbow scope mounting guide can help you understand these factors better. The following is an in-depth guide on how to mount a rifle scope on any crossbow.
How to Use a Rifle Scope on a Crossbow?
Using a rifle scope on a crossbow requires you to mount it and set it up properly. You can use the guide below to ensure you go about the process effectively. It would work well if you had some essentials to mount a rifle scope to a crossbow correctly. Items you need include:
- Loctite (recommended, although optional)
- Properly fitted Allen wrench
- Properly fitted screwdriver
- Your rifle scope
- Get the right matching scope rings for the rail
- A mounting system if your bow doesn’t have one
- A level
- A padded vise

Step 1: Mounting the Crossbow on the Padded Vise
For the first step, you want to use the padded vise to mount the crossbow and level it. This step is vital if you want the rifle scope installed adequately. If you ignore this step, you may get other problems affecting the sighting later.
After you have placed your crossbow in the padded vise, horizontally lay your level on the arrow flight rail. Ensure you have leveled the crossbow in the vise before you lock it down.
Step 2: Removing the Iron Sights
You need to remove any iron sights your crossbow may have. Most crossbows have a manual with instructions on how to remove the rings. Ensure the crossbow is in the vise before you start.
Step 3: Installing the Mounting System
Some crossbows come without rails. If this is your case, you need to install a mounting system. Start by removing any filter screws from your crossbow’s top. Use oil or Loctite to install the bases of your mounting system.
You may choose oil or Loctite, depending on the recommendations by the rifle scope’s manufacturer. Check to ensure you match the screws to the proper holes because some bases come with screws of different sizes.
The manufacturer’s recommendations are required. Some may say using Loctite will void your warranty. If this is true, you need to be very careful when using Loctite. Unfortunately, not using Loctite may cause your scope not to tighten correctly. Use a very light coating of Loctite when you are applying it to the screws. Never apply any Loctite to the threaded holes.
Step 4: Installing the Scope Rings
Properly installing the scope’s rings is your next step. You want to ensure the rings can allow the scope to lay down with minimal room for movement. This will also ensure you can tighten the scope into the rings.
Start by installing the bottom half of the rings. Use the right Allen wrench or screwdriver to fasten the rings securely into place.
Step 5: Installing the Rings
The leading cause of scope damage is improperly aligned rings. Use this step to avoid such a situation. If you want the best results, use a scope alignment tool. It is placed between the ring halves, and now you can move the rear and front rings together with the tool. Do this until the pointed tips of the alignment almost touch.
Step 6: Putting in the Scope
Ensure the crossbow is still level. Now you can set the scope onto the rings. If everything is set upright, it should fall to the bottom of the ring. At this point, install the top half of your rings. Tighten them lightly.
The turret’s of the scope needs to be positioned right. If not, you will find it more challenging to use the reticle, and it will be off. For the elevation adjustment, the top turret needs to be perpendicular to the ground. On the side, there is a windage turret that needs to be parallel to the ground.
Step 7: “Bore Sight” your Scope
To boresight, it is advisable to use a laser bore sighting tool. It is best to ensure your scope is bore-sighted before heading to the range. Make sure the crossbow is still level in the vise.
Draw a horizontal line on the opposing wall away from the crossbow. Confirm the line is genuinely horizontal by using a level.
Generally, a rifle scope is zeroed at 100 yards where a crossbow is at 20 yards or 30 yards. Look through the scope and align it so that the line you drew on the wall matches the horizontal crosswire in the scope. Tighten up the scope when you are finished.
Types of Scope

There are different types of crossbow scopes available in the market today. Knowing the types and insight on each will ensure you get the best for your crossbow.
Red Dot Scope
Simplicity has its advantages. The good thing about red dot scopes is they simply use a dot for direction. You don’t need any costly ballistic calibrated reticles or any type of magnification. You just get a red dot to point you towards your intended target.
Parallax Error
One of the main advantages of using such scopes is they are accurate. Just shoot when your red sight meets your target. This is known as parallax error. It is similar to what you would see if you used a rifle scope. This feature makes red sights better for archery situations like shooting in an awkward position or from hanging from a tree branch.
If the scope that came with your crossbow is legal in your area, they are the best option for a crossbow. They provide you with a simple, but tough aiming system making it hard to miss.
As usual with any product, you get what you pay for. Squeeze a few bucks in your crossbow scope investment if you want minimal disappointments and you are not a good shot.
Magnified Scope
At first glance, a magnified scope looks like a good idea. Of course, you would like to have a bigger target right?
The downside is that according to the rule of optics magnification ensures you see better, but does not ensure shoot better. You need to determine the importance of magnification before you get such a scope. Only recommended if you are shooting more than 50 yards. Long-range shooting is regarded as shooting at targets at a distance of 100 yards.
Guns will always shoot better and further than a crossbow. This means you cannot effectively use a rifle scope on a crossbow unless you are experienced with scopes.
Ballistically Calibrated Scope
These come with reticle designs as a way of predicting the flight path of your arrow. For example, the multi-pin sights you can see on any bow are ballistically calibrated. Each pin is designed to ensure you measure a specific distance.
Crossbow reticles are usually the same. Take note some of them do not allow you to adjust them to get parameters for which they are not designed. Make sure you understand the crosshair and corresponding distance if you want to use a ballistically calibrated scope for a crossbow.
Bottom Line: Using a Rifle Scope on Crossbow
Use the same principles you did when sizing up your crossbow. The ranges, your skill, and the intended targets are all factors you need to consider.
Usually the bigger the game means you need a more powerful crossbow and more powerful scope. This does not mean you need a magnified scope.
The rule of thumb is getting a lightweight effective scope. Start simple with low-budget beginner’s scopes especially if you are a beginner. This way, you can get a lifetime crossbow scope without spending much on trying other alternatives.
More Related Articles:
- Best Scopes For SKS Rifles
- Best SKS Scope Mounts
- Best M1A Scope Mounts
- Vortex Viper HS LR 4-16X50 Review
- Vortex Crossfire II Review

